Wednesday, 15 November 2017

Factory Shoemaking in the 1930's


This is a wonderful video about the process and all the different stages. How much time and effort was taken to make a noble shoe in the 1930's. A real insight. Style never goes out of fashion.


Shoemaking Process

Take a look at the process of shoe making, which is quiet an artist craft. Here are some videos that show just how complex, time consuming and artist the whole process is.

Here is a sneaker being handcrafted.


And this video is about the process of a dress shoe.


Thursday, 19 October 2017

First Attempt at the Patina Technique

Here is my first attempt at the Patina Shoe in Blue. I think I need a little more working on this technique but it was a whole lot of fun in the trying. What is interesting is that it really matters about the quality of the leather and how this magical living material lends itself to all kinds of treatments but the important thing is to understand the movement of the shoe and the gradual process of applying the dyes, creams and the polish. This was a great experience and I can see I can only get better.


Onwards and upwards.

This was a complete mess, an utter disaster but an interesting learning process. The dyes and polish started coming away from the shoe revealing the previous black shoe beneath. My efforts were too impatient and the shoe paid me back for that. I have to strip everything back with nail polish remover and start right from the beginning, allowing appropriate time for each phase. The secret is to do 5 per week, one on each day so you are then have shoes to work on throughout the week.

Mike Wilson | the Jazzman

This is Mike Wilson from Washington, USA. The "Jazzman" - this SHINER can make the shoes sing like a perfect Blue Note Quartet. Now this is what I'm looking for in my SHINE. Wonderful theatre with the brushes and no gloves...the Naked Shine....Perfect.

Tuesday, 17 October 2017

Wednesday, 11 October 2017

Patina on Shoe

Here is an excellent example of the process of creating the Patina Shoe.


I really liked watching this..


The Nodding Cobbler | Royal Tunbridge Wells

Had my cowboy boots worked on here. Excellent guy. I am still to know his name but he calls me Sir, which is annoying because he knows I want to work for a living. Great job done.

Shoe & bag repairs in Royal Tunbridge Wells

The Nodding Cobbler are family owned and committed to high quality workmanship and exceptional customer service. As well as a full shoe repair service, we offer a stitching service to replace elastic, lengthen or shorten straps and even repair your favourite handbag. Call us today to find out more.
Bag and shoe repairs in Tunbridge Wells

Shoe Repairs        

A quality shoe repair can prolong the life of your favourite shoes considerably. As skilled cobblers, we also specialise in repairing equestrian, dance and ballet shoes, and use techniques that can strengthen and alter your footwear to increase comfort and longevity. Our rubber soles can also make your shoes last longer by protecting the original sole from wear and tear.


Here is the website: http://www.thenoddingcobbler.co.uk/Shoe-repairs

Contact details

3 Grosvenor Road
Royal Tunbridge Wells
TN1 2AH
Call us: 01892 457077
Email: info@thenoddingcobbler.co.uk

Tuesday, 10 October 2017

Waxing Leather Boots

This is what Granger's of the UK say:

Source: Grangers


I want to wax my leather boots.

Unlike other footwear, your leather boots might need a little extra care if they’re to keep performing at their best. Fortunately, with Grangers range of dedicated leather-care products, keeping your leather boots in top condition is easier than you think…

The best way to keep smooth leather boots looking and performing like new is by waxing them. First, make sure that your boots are clean – for best results, we recommend using Grangers Footwear Cleaner.

Then, once your boots are clean and dry, it’s time to pick the right product depending on your needs:
  • G-Wax offers great all-round performance, including good water-repellency, good levels of conditioning, and only a minor decrease in breathability.
  • Leather Conditioner  is a cream wax that comes in a tube rather than a jar. It provides similar performance as G-Wax, but is easier to apply and perfect for topping up high-wear areas.
  • Paste Wax is perfect for providing maximum nourishment to dry or cracking leather. It offers great water-repellency, but does affect breathability as a result.
Whichever treatment you choose to apply, make sure you use a clean cloth and rub the product into the surface of your boot – making sure to treat around the laces and along any seams or joins!

Polishing Exotic Shoes

Here is a video about how Kirby Allison from the Hanger Project polishes up his late Grandfather's crocodile shoes.


WATERPROOFING USING MINK OIL

How to Waterproof Leather Soles

Source: Our Everyday Life

by Bonnie Conrad 


Joe from the TIMES: "Reading around this subject, the mink oil is excellent on rougher leathers like saddles, cowboy boots, leather jackets and bags. What I have learned is that this oil is ideal for most leather shoes, especially for the soles of office shoes. By applying mink oil to the base of the shoe will ensure the salt in the rain water doesn't erode or corrode the sole too quickly, thereby prolonging the life of the shoe."


With the right care and maintenance, leather-soled shoes can provide many years of great service. Leather-soled shoes are also comfortable to wear and very attractive, making them an excellent choice for both casual and office wear. The proper care of your leather-soled shoes should start as soon as you bring them home from the store and continue through the life of your shoes. By taking the time to waterproof your shoes right away, you can extend their useful life and save yourself a lot of money.

Items you will need

  • Shoes
  • Shoe trees
  • Saddle soap
  • 4 clean soft cloths
  • Toothbrush
  • Mink oil
Place a good set of shoe trees inside your shoes to help them retain their shape while they are being cleaned. Mix a solution of saddle soap and water using twice as much saddle soap as water, then dip a clean dry cloth into that solution.
Go over the entire surface of your shoes, including the leather soles, with the saddle soap solution. Use a toothbrush to get into any nooks and crannies in the shoes.
Allow the saddle soap to soak into the leather for 10-15 minutes, then wipe the excess away using a clean dry cloth. Use another soft cloth to polish the shoes until they shine. Make sure you go over the leather soles of the shoes to remove all of the remaining saddle soap.

Moisten a clean cloth and dip it in a can of mink oil. Apply the mink oil generously to the leather shoe soles, making sure that the oil is applied evenly to the entire surface of the sole. You can use an old toothbrush dipped in mink oil and apply it to the corners and edges of the sole and to the area where the sole meets the rest of the shoe. The mink oil will help to keep the leather soft and supple and it will also increase the water resistance of the leather.


Warnings

  • Mink oil will darken light leathers, so use caution when applying it to light-colored shoes.

Myth or Magic | The Banana Skin Shine

Can banana skins shine your shoes?

Source: Yuppie Chef


Yip, you heard us right. Some clever monkey (maybe it was Mash) figured out that bananas are not only prized for their beautiful yellow fruit but that their skin has a greater purpose. Since we were just about due for another quirky Myth or Magic, we decided to go bananas for the month of March. So let’s see if their skins really can shine shoes. Giddy up.
To test this kitchen myth you will need:
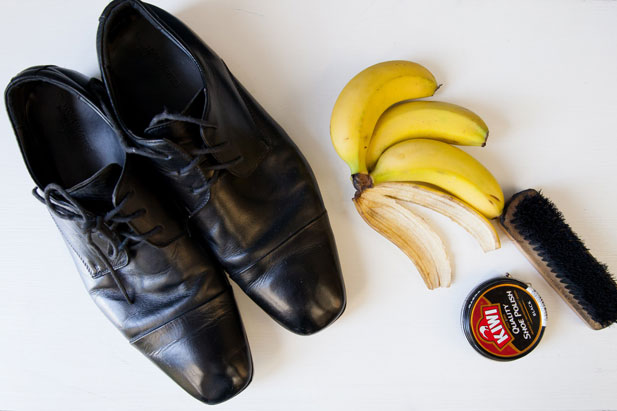
Banana skin shoe shine

A bunch of not-yet-ripe bananas
Soft muslin cloth
Some willing volunteers…
…and their shoes
Your regular trusty shoe polish (because comparing is caring)
And a good sense of humour
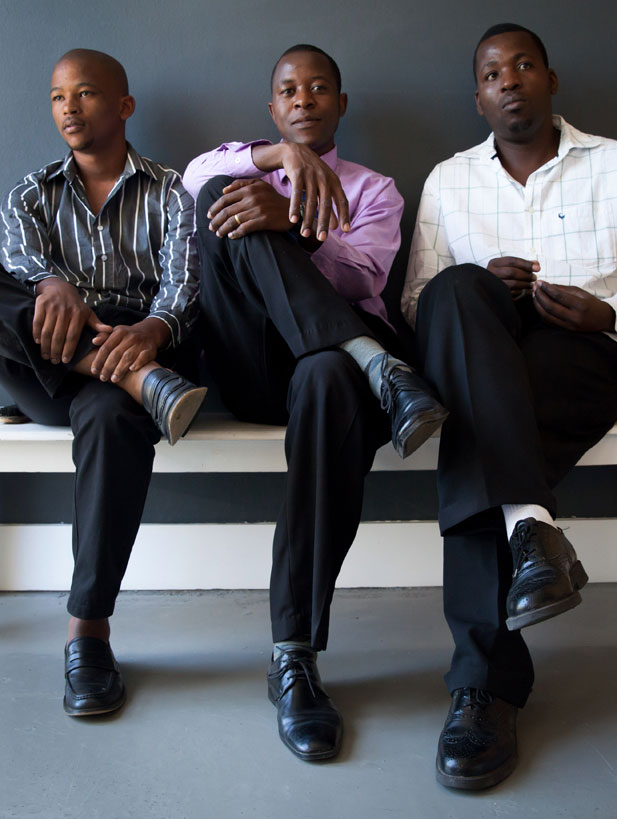
Volunteers to test the banana skin shoe shine myth

Thina, James and Ashmore came to the party, dressed in their Sunday best – may as well put a potentially shiny shoe to good use, right? First we took some evidence of the lack lustre state of their shoes. Yep, decidedly matt.
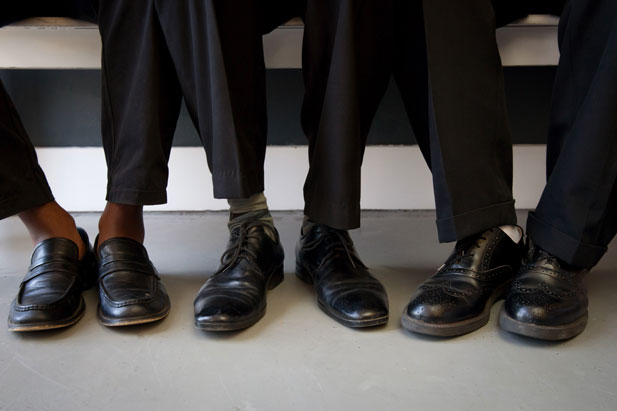
Shoes prior to polishing

Then we set about ridding the bananas of their contents. It’s best to use slightly green bananas for this, as their skins do not ‘shed’ as much fibrous banana matter onto your cool kicks. Why bananas you might ask? They contain potassium, which is coincidentally found in, you guessed it, shoe polish. This combined with their natural oils is said to make a winning boot buffer.

Eating bananas for myth or magic test

We decided to polish the left shoe with banana skins and the right shoe with shoe polish, to compare the shininess.
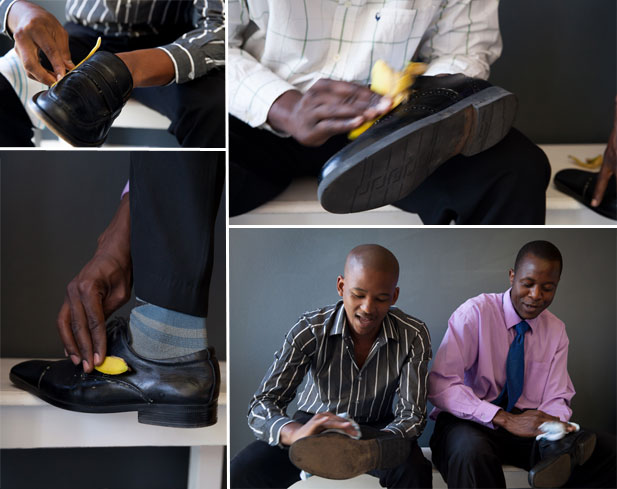
Shoes polishing with banana skins

Check it out. Shoe polish vs banana skins.
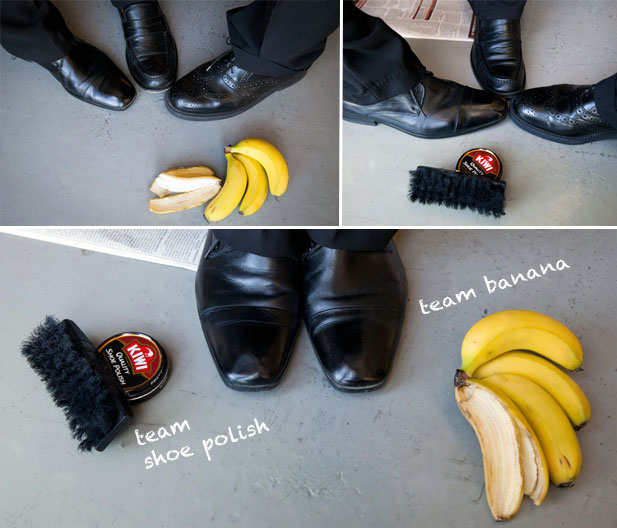
Comparing shiny shoes

We think the banana peels did a stellar job, without any nose-wrinkling chemical fumes. How’s that for an economiser and an environmental win? Banana skin shoe shine is most definitely magic.
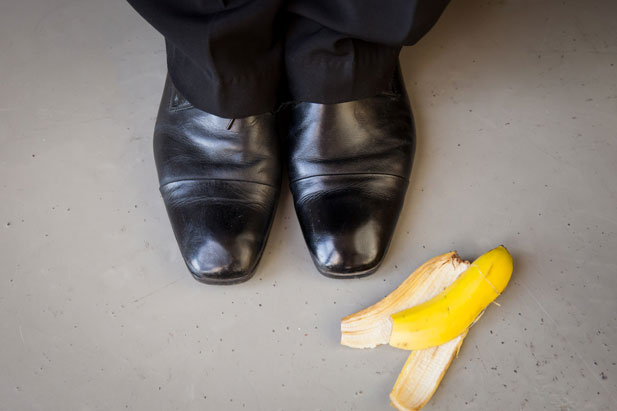
Magical kitchen myth - banana shoe shine

Guess what else you can add a nice sheen to with banana skins? House plants, broad leafed ones, of course. Don’t go shining up your ferns folks. Over and out.

POLISHING A LEATHER SHOE

Source: Monsieur Chaussure

This lesson shows you how to prolong the useful life of all your leather shoes, whether they are a pair of Blake or Goodyear shoes.

STEP 1: PREPARATION


Remove the shoe lace to avoid soiling them and block the eyelets.
Place your wooden shoe trees into your shoes and stretch them.
Lay out all your care products on your work surface.

STEP 2: DUSTING


Brush your shoes vigorously, using your shoe cleaning brush to remove any excess dirt. Pay particular attention to the wax stitching.

The shoe cleaning brush is to be used for removing dust and dirt only. Do not use this brush for shoe shining.

It is essential to remove the dust before proceeding with the suede care to ensure that impurities do not get trapped in the leather. This will result in the opposite of the desired results which is to prolong the useful life of the shoe.

Dépoussiérer

STEP 3: CLEANING


Wrap a polishing cloth around your index and middle fingers.

Dampen the polishing cloth with your leather cleaner and apply the product to the shoe using vigorous, circular strokes.

During this step you will be cleaning the shoe by removing any old shoe polish. Pay particular attention to any creased areas caused by walking. Using vigorous strokes in the direction of the length of the shoe will help you smoothen out any such creases. Do not neglect the edge of the (smooth) shoe sole and the heel.

When all the old shoe polish has been removed, use a clean part of the polishing cloth with a bit of the leather cleaner to make sure that no polish is left. At this point, if your polishing cloth remains clean, this step is finished.

This procedure allows the shoe to last longer and prevents cracking.

Nettoyer

STEP 4: NOURISHING THE WAX STITCHING


Dab your welt brush into the dubbin and apply the product generously to the welt edging to allow it to fully penetrate and nourish the wax stitching.

This nourishing step is very important since dried out stitching comes apart and could compromise the stability of the shoe sole.

Pay particular attention to the stitching around the tip of the shoe as this is the part that is most exposed to impact.
Cirer ses chaussures en cuir

STEP 5: NOURISHING THE LEATHER


Wrap a polishing cloth around your index and middle fingers, making sure that is taught and has no folds.

Dip the polishing cloth into a bit of the shoe cream and apply the product to your shoe. We recommend using a shoe cream in either the same colour as your shoe, or a slightly darker shade. Lighter colours tend to reveal the creases and wear and tear marks on a shoe.

Use broad, vigorous and circular strokes when applying the shoe cream. The leather should be saturated with the product.

Do not neglect the sole, tongue and heel of the shoe. Pay particular attention to creased areas as the creaming motion creates the heat needed to smoothen them out.

This step will nourish the shoe leather and revive its colour.

When the leather is saturated with the shoe cream, remove any excess product with a shoe shine brush at the joints and stitched areas. Allow the product to work on the shoe for a few minutes.

Nourrir le cuir

STEP 6: WATERPROOF POLISHING


Dab your shoe dauber into the Spahir deluxe shoe polish and apply the product to your shoe. A navy blue polish can be used on a black shoe for a deeper black shade, and a Bordeux polish can be used on a brown shoe to create an interesting undertone. If your shoe has a multi-coloured patina, opt for either a neutral or a beeswax yellow shoe polish. The neutral polish will slightly lighten the patina, while the beeswax yellow polish will accentuate the colour contrast.

The shoe dauber is important for applying the shoe polish to hard-to-reach areas. The shoe polish carries no nourishing properties and as such, will not “penetrate” the leather. Its purpose is to create a shine and waterproof the leather.

Allow the product to dry for 5 to 10 minutes, then brush the shoe using a shoe shine brush and broad, gentle strokes.

Lustrer

Conclusion

Cirage complet du soulier en cuir


The Glacage Polish

 Introduction

Source: Monsieur Chaussure


Glacage is a unique polishing technique that is highly prized by true leather shoe lovers. Beginners can also learn this art. All it takes is a bit of patience, perseverance and sleight of hand to produce a beautiful glacage worthy of any shoe connoisseur.

A beautiful glacage depends on the skill of the polisher. For this reason, Monsieur Chaussure has endeavoured to capture the polisher’s thought process while carrying out a glacage so that you can have all the necessary tools for transforming your shoes into works of art.

A glacage can be done whenever you polish your shoes.

Step 1: Preparation


The first thing to bear in mind is that there is no standard time duration for glossing a pair of shoes. The length of time taken depends on the type of leather, the age of the shoe, the products used and your experience in treating leather.

Start by setting aside at least 10 minutes for your glacage, keeping in mind that a professional can take over half an hour to obtain a high-gloss shine.

Place wooden shoe trees into your shoes and stretch them.

Regarding the products needed, we recommend using the Famaco Abbey shoe polish paste as it is specially formulated for high-gloss polishing (like all our products, you can test this paste in our store before purchasing).
Use a polish paste that matches the colour of your shoes. If your shoe has a multi-coloured patina, opt for either the neutral or the beeswax yellow polish paste. The neutral polish has a slightly darkening effect on a patina, while the beeswax yellow polish accentuates its colour contrast.

As surprising as it may seem, we do not recommend using a polishing cloth for a glacage. Polishing cloths are excellent for colour removal or for applying shoe creams. However, when it comes to gloss polishing, a fine, smooth cotton cloth works best. Any old T-shirt or scrap from an old sheet is perfect!

Keep a container of warm water nearby.

For the shoe:

Your shoe must be perfectly polished before you begin a glacage. See our leather shoe polishing lesson to learn about this process.
Dépoussiérer

Step 2: Glossing


Now that your shoes have been prepared with their shoe trees, you can proceed with the glacage. To begin, wrap a cloth firmly around your index and middle fingers, making sure that the section covering your fingertips is perfectly flat. You will need to keep the cloth in this position from start to finish.

A glacage consists of alternating between two phases. The first phase involves the application of a polish paste and the second phase uses water. Repeating these phases crystallises the wax particles to produce a smooth, mirror-like shine.
Given that the crystallisation process solidifies the wax, the glacage should only be carried out on the tips and backs of the shoes where the leather never bends.
 
Nettoyer
 
 
Phase One:

Dab your cloth one or two times on the shoe polish as though you’re playing the piano. Alternating between the polish paste and the water is what produces a high-quality glacage. Do not try to speed up the process by applying larger amounts of polish paste.

With one movement, apply a bit of polish paste to the glossing area and rub the leather using small circular strokes without staying too long on one spot. You should start with slow movements in the initial glacage phases, followed by quicker movements in the later phases.

Observe the feel of the polish as you proceed. In this phase, the surface should feel greasy at first, and then gradually become drier. As soon as the surface feels dry to the touch, (this is where your experience comes in) proceed to the second phase.

Phase Two:

Dip the tip of your cloth-wrapped middle finger into the warm water and apply no more than a single drop to the glossing area. Immediately spread out the water over the glossing area and massage the leather using small circular strokes without staying too long on one spot. Keep up the same rhythm as in phase one.

You will observe the same greasy feel on the surface followed by a gradually drier feel. When the surface appears stable, repeat the cycle.

Nettoyer

Step 3: Maintenance


Between polish treatments, the glacage on your shoes will be exposed to impact, scratches and bad weather.
 
To revive your glacage, simply proceed with phase two of the process alone, until the mirror shine returns.

If your shoes only have a bit of dust or traces or water, use a new polishing cloth or a special brush designed for glacage and patent leather. Never use a regular polishing brush on a glacage.
 
 
Cirer ses chaussures en cuir


Step 4: Special Cases


Leather is a very complex material. If you have a hard time identifying the different types of leather or if the products used are not recommended by Monsieur Chaussure, you may be in for some of these unpleasant surprises:

- The edges of the glacage may show cracks and flake away from the shoe like dry skin. This indicates that either your glacage has been spread out too far onto the bendable areas, or that the products used were of inferior quality;

- Tiny cracks appear over time on the glacage, even at the centre of the shoe tip. This usually means that poor quality products were used;

- The glacage does not stay when applied and small white spots appear on the leather. This means that the leather is damp. In such a case, you will have no other choice but to let it dry overnight before restarting the glacage.

Conclusion


The glacage technique has been around for a long time. Given that there are various ways of successfully carrying out a glacage, we do not wish to impose a universal technique with this lesson.

We hope that it will enable you to familiarise yourself with the glacage technique so that you can come up with the one that best suits you.


Cirer ses chaussures en cuir

Monday, 9 October 2017

Patina Technique

Mastering the Patina Technique on Shoes

Source: Monsieur Chaussure


Introduction


The goal of a shoe patina is to change the appearance of a shoe by playing on the design, contrast and colours of its leather. This technique was formerly reserved for the major shoemaking companies, but has since become a common practice due to the development of new products as well as the commercialisation of untreated and un-tinted leather shoes.

Unlike our shoe polishing lessons, this guide is more of an introduction to patina shoe design.
You will notice very quickly that the requirements for this procedure are similar to those of the shoe glacage procedure, namely a lot of patience, humility (your first patina may not be a masterpiece) and a very small quantity of the product.

Step 1: Preparing your Work Surface


You will be using solvent-based products to remove the colour from the leather or permanently dye it. We therefore strongly recommend protecting a large work surface, and wearing an apron and gloves.
Make sure that your working area is well-ventilated and that you are seated to ensure greater precision as you proceed.

Step 2: Preparing the Dyes


No one dye can create all colour nuances. The main ready-to-use dyes come in base colours, such as the Saphir blue, red, yellow or purple, and mixing colours, such as black, brown, green, violet etc. To obtain other colours or lighter shades, you will need to mix several dyes and use the lightening base for adjustments. Here is a reminder:


Nettoyer

Prepare your base dye. This will be evenly applied to the shoe and will constitute the lighter side of the patina contrast. If you would like a more pronounced patina, use a very light colour. In this example, we are using an orange brown.

Prepare the dyes needed for the design. In this lesson, we are using a medium brown, a dark brown and a black.

Use drawing paper and glass containers for mixing your dyes, bearing in mind that each type of leather produces different colour results. In any case, you will need to adjust your mixture after the first colour applications on the shoe.

Step 3: Removing the Colour


This step is undoubtedly the easiest and also the riskiest when it comes to patina design. If your products are too harsh or the colour is removed too hastily, you may end up altering the leather, which can significantly decrease the useful life of your shoe.

We recommend proceeding with the colour removal phase in very gradual steps in order to evaluate how the leather reacts.


Begin by gently rubbing the leather with an old cloth and a very small amount of the colour remover. Allow the product to work for 5 to 10 minutes, then observe the state of the original colour of your shoe.

If the colour does not lighten, stop the process altogether and choose another pair of shoes. This is often the case for black shoes. Some people recommend using products such as bleach to lighten the leather more quickly. Monsieur Chaussure strongly advises against the use of these types of products as they can burn the leather and make it dull, breakable and dry.

If the colour lightens, continue to alternate this colour removal phase with the drying time. The goal is to obtain a slightly lighter shade than the base dye.

For un-treated (un-tinted) leather, a single application of the colour remover is enough to prepare the leather.


Cirer ses chaussures en cuir

Step 4: Base Dye


As previously indicated, the base dye constitutes the lighter side of the patina. It must be applied evenly over the entire shoe and must be light enough to increase the undertones of your design.

Dip a large, soft paintbrush into your base dye and wipe the brush onto a cloth. In one single stroke, apply the base dye to the shoe from one end to the other. Never brush the same area twice. Allow to dry for 10 minutes.

If you are satisfied with the base colour, move on to the next step. If you want a darker shade, apply another coat of the base dye. Repeat this step until you achieve the desired base colour.

The use of scotch tape is sometimes recommended for protecting the shoe’s heel. We consider that protecting the heel in this manner reduces your precision when applying the product. A good measure of patience and a precise stroke is all you need to obtain a beautiful, even base colour.

In this example, a second coat of orange brown with a higher orange colour concentration was applied.


Cirer ses chaussures en cuir

Step 5: The Design


At this stage, our advice will be more discreet so as to allow you to express your full artistic abilities and taste. The possibilities are endless.

The only rule given by the Monsieur Chaussure shoemakers is to always begin with lighter shades and end with darker shades. In this example, the patina was created with a brush in three stages beginning with a medium brown, followed by a very dark brown and completed with a touch of black.

Do not hesitate to use any type of tool, be it a sponge, a newspaper, a cloth, your hands etc.
Some people test their patina design on drawing paper only to realise, very quickly, that leather is a material which is full of surprises and that no two leather shoes are identical.

So here is our final piece of advice: be patient, proceed step by step, allow the shoe to dry between each stage and use the dye very sparingly with each application. These precautions will result in a more precise patina that comes as close as possible to the patina design you imagined.


Cirer ses chaussures en cuir

Step 6: Full Polishing


Due to the harsh effects that colour products have on leather, it is important to conclude your patina with a full leather care treatment. For this, we invite you to have a look at the leather shoe polishing lesson. To maintain the depth of the patina, opt for a neutral shoe cream followed by a beeswax yellow shoe polish paste.


Cirer ses chaussures en cuir


Conclusion 


Cirer ses chaussures en cuir

Dave Goodall | Sunshine Shoeshine

Beat homelessness: Drew Goodall
Mr Dave Goodall

Rags to riches: formerly homeless man now makes £250k a year with shoe-shining business

Source: Evening Standard  
Author |  Barney Davis

An actor who appeared alongside Brad Pitt and Hugh Grant but ended up living on the streets now has an annual turnover of £250,000 with his shoe-shining business.

During his twenties Drew Goodall — who is a multiple British shoe-shine champion — took minor roles in movies Snatch and About A Boy after finishing his degree in acting.

But months later he found himself homeless. After a newspaper review for the play Marat/Sade criticised his acting “it just destroyed my confidence. I was so stressed about doing the show, I just gave up, I wasn’t having fun any more.”

Sleeping in parks in Walham Green and Turnham Green, Mr Goodall was verbally abused and assaulted. “I was attacked in the night in my sleep.

“Drunks would walk across the green and pounce on random homeless people. I slept in the props cupboard at The London Academy of Performing Arts. It was weird waking up to a Henry VIII costume next to you. If I slept late a class would come in and I’d have to hide and sneak out later.”
Now 43, Mr Goodall started his business, charging £2 a shine, after saving money to buy a tin of polish. He launched Sunshine Shoeshine in 2012 and today counts City banks as customers and donates thousands of pounds a year to charities. The Twickenham-based firm employs eight people working across more than 50 businesses a week.

It hires homeless people, including some with special needs, to help them back into work. He said: “People fall through the cracks — becoming homeless can happen to anyone.”

Tuesday, 3 October 2017

Customize Men's Shoes

DIS custom shoes for man are designed by you and beautifully crafted using the highest quality materials from experienced hands. All our collections are completely handcrafted in Italy. Choose one of the models in the new collection of men's footwear DIS and customize every detail. Soft suede moccasins, for a cool summer look, loafers Men in deco calfskin for a casual outfit even at work. Oxfords and derbies dovetail in brushed leather for a perfect English style. Boots and ankle boots with rubber soles for the rainy days. Choose between a great selection of materials to create your custom sneakers, now with the new feature to print on the shoes the graphic you want.


Contact: https://www.designitalianshoes.com/en/customize-mens-shoes

Saturday, 30 September 2017

Shoe Shining in Japan

This video slightly goes against my ethics and although the Shine is flawless it is also footless. Here is a wonderful example of the 'SHY SHINER' from Japan. There are many wonderful tricks to learn here. Check out the lovely lace performance at the end.


Coconut Oil for Darkening

Here is a process of darkening the shoes, boots or bags using Coconut Oil.


Vasceline for Shoes and Boots

Here is one of the processes used in the Post Shine.


Saddle Soap

Here is one of the most important products needed when working with leather.


Saddle soap is a proprietary compound used for cleaning, conditioning, and protecting leather. It typically contains mild soap, softening ingredients such as lanolin, and preservatives such as beeswax. It is commonly used on leather footwear, saddles, and other items of horse tack, hence its name.

Tuesday, 26 September 2017

Horsehair Brushes

Researching on the best horsehair brushes for shining my Customers shoes. It's all here ONLINE. How marvellous. Personally, I am having Special Horsehair, from only horses that have won at Lady's Day at Ascot. Only my brushes can give my Customers the perfect 'English Polish'. All My Brushes Will be Handmade in England. This Shoe Shine Business has got REAL LEGS.


Monday, 25 September 2017

Making Polish


The Best Shiners make up their own recipes for the waxes and add in the dyes accordingly.


The Denver Shine

This is a decent shine but far from the best. The Shiner is wearing too much glove and not enough skin. Show your proud, filthy fingers Shiner. STOP WASTING MY TIME. I want to buy a pair of Darley Gloves from Mulburry at £250 (CLASSIC ENGLISH BRAND) and then cut the tips off and personalize my English gloves for my perfect 'English Polish'.

Over time I will create my own 'English Polish' gloves but to save time as I establish myself I am going to be a little lazy and support one of England's best brands, Mulberry.

Darley Gloves from Mulburry at £250    


Ernie | The Shiner

I want people to fully understand. I want to be the best shoeshiner because I am lonely. I want to be on my knees talking to fellow lonelies, like myself. I want to spend my time chatting and shining, talking shit and sharing ideas. I want people to earn my shine. To really deserve it..because I can deny you all now. What a wonderful FREEDOM I have found, I AM THE SHINER. I don't want to be in some fancy restaurant with a selective group of friends. OH NO. I am happiest when I am with my lonelies. Just had to air that publicly. This ShoeShining business is growing legs by the day. Loving it LARGE! You see, true honest WORK brings out the very best in us all. Here is the sort of standard I would like to rise to. Many thanks Ernie.


SHOE SHINES ARE FOR EVERYBODY. NOT JUST THE RICH. IT IS GLORIOUS. As they say in NYC, "GIVE YOURSELF A TREAT, SIT YOUR BACKSIDE IN MY SEAT!"  I want everybody on Earth with shoes to have their shoes shined by another human being. IT UNITES US ALL.


American Shiners

This is no joke. When I have perfected my "English Polish", I want to send myself on Youtube. This Shine I am about to introduce you to attracted over 1.3 million viewers. The Shoe Shining business is growing legs by the hour. This is what happens when you abandon money and live in a world of ideas. This is ART in FULL FLOW! This is NOT THE BEST. This is nowhere near the best. These Shiners are not lonely enough to be the BEST. I am the best and intend to prove that to you all.


We're getting there. This man is a Loner like me.  Comes up a little short on his conversation here but a good example.


From Greenboro, NC, USA

Now this is Artistry. The conversation is good. The quality of the Client is standard, a little chatty but comfortable. Where the Shiner fails somewhat is in the seat he is offering. It is certainly not comfortable enough for my Clients. I have the best seats being prepared for the "English Polish". A complete NO-NO is to have a mobile phone at work. So UNPROFESSIONAL - How very rude, but then again, he's an American.

Tying Laces

The issue of tying laces the correct way.


See more tips on tying and lacing shoes here: http://bit.ly/2mptGcm